In recent years, the popularity of homebrewed beer has skyrocketed. It’s now considered rather hip to be brewing your own beverages and if they’re made in a basement on a shoestring budget, perhaps they’re all the better for it. It’s fair to say the ‘DIY’ brewing movement has exploded as people seek a better understanding of how mass produced products like beer are formed.

While it may be fashionable right now, homebrewing is not a new hobby. Beer brewing has been practised, in some form or another, for around 16,000 years or since settlers began to cultivate grain. Among the earliest written words ever discovered are a recipe for a homebrewed beer made from bread. So, it’s wonderful to see a new generation of homebrewers creating exciting beverages using techniques which are surprisingly similar to those their ancestors would have used.
Today, we’re going to discuss everything you need to know about the practice of homebrewing: brewing your own fantastic beer at home. It’s a lengthy process and it does require patience, perseverance and attention to detail. However, it’s probably much easier than you think. The thing about homebrewing is that the length of time it takes tends to intimidate people. Things happen slowly. They need to be checked carefully.
It’s not a difficult process; it’s a precise one. And it’s a highly rewarding one too. Let’s start by taking a look at the ingredients required for a successful homebrew.
What Ingredients Do I Need for a Homebrew?
Water
If we go by volume, water makes up the biggest proportion of any homebrewed beer. For most, the amount is anywhere between 90-96%. So, it makes sense to use water with a pleasant taste that’s not too hard or too rich in minerals like sulphur and bicarbonates. As water is very important to these recipes, many brewers use bottled spring water. However, for your first home batch, regular tap water should be fine as long as it doesn’t taste of chlorine or hard minerals.
Barley (Malt)

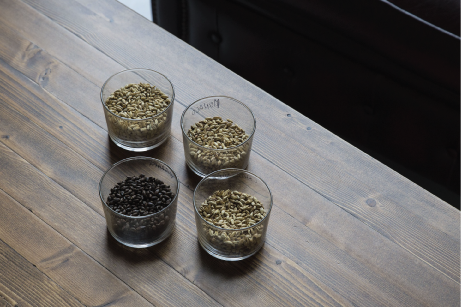
The crucial source of malt in your homebrew comes from a malted grain such as barley. It’s similar to wheat but with a specific shape and size. For the purposes of DIY beermaking, barley grains are steeped at specific temperatures and grown under strict conditions to encourage a larger, richer yield. It is essential the barley grains are grown, then cut off from growing at precisely the right time. This process ensures the starches turn into the sugars required for fermentation.
If you cannot source pre-milled barley grains, you must be willing to crush them yourself. You can do this rather easily with a Ziplock bag and a rolling pin. Just place the grains inside, commence to bashing with the rolling pin and, voila, perfectly milled barley grains.
Hops

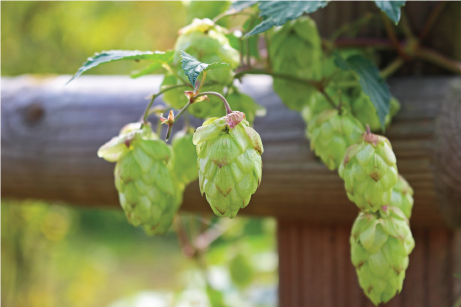
For many DIY homebrewers, the most exciting part of the ingredient list is the hops. While hops get plenty of attention from beer connoisseurs – they’re one of those words that constantly crops up in discussions about microbreweries – it’s rare to actually see them up close unless you’re creating drinks at home. Hops are a super tall vine species which, when added to beer recipes, generate bitterness to counteract the sweetness of the malt. They also have the practical benefit of slowing down spoilage.
Yeast

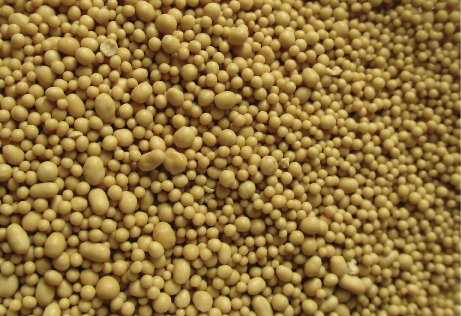
In many ways, yeast is the most complex ingredient. Although we did promise to keep things simple, so we won’t go into detail about the many different types you can buy. Yeast is a microorganism which is very much active and alive. It feeds on sugar and, when added to a sugary sweet concoction like a homebrew, it consumes all that is available and expands in size as a result. The very important by product of this process is, of course, alcohol.
Yeast is not difficult to source. It’s widely available in supermarkets and health stores. However, many types are not suited to beermaking, so we strongly recommend you buy a yeast product that’s been specifically created for brewing (rather than baking or another ‘cooking’ process). Lager yeasts ferment at colder temperatures. Ale yeasts begin to ferment at much warmer temperatures.
What Equipment Do I Need for Homebrewing Beer?
Homebrewing requires you to have a lot of specific items to hand though most are easily sourced. They are widely available and, in most cases, reasonably affordable. You could even ask to see if friends and/or relatives have any spare pieces of equipment lying around collecting dust. You’d be surprised at what you can find in people’s storage spaces.
The basic equipment you’ll need includes:
1 x Plastic Fermentation Bucket
Your plastic container should hold around 22 litres which is equivalent to forty pints. It should also have a secure airtight lid. One place you might want to look is your favourite restaurant or takeaway; the lidded food buckets they use (and normally throw away) are near perfect.
1 x Long Handled Spoon
The brewing spoon doesn’t need to be special in any way, but it should have a fairly long handle. The longer the handle, the easier it’ll be to stir your beer.
1 x Beer Barrel/40 Beer Bottles
You’ll need somewhere to store your DIY beer once it’s brewed. You can buy homebrew barrels – in this case, get yourself a 22 litre barrel – or you can use standard beer bottles. We recommend the latter because it’s cheaper and environmentally friendly; most bars are perfectly happy to let homebrewers reuse their empty glass bottles if they ask nicely.
1 x Clear Plastic Tube
You’ll need this to get the beer into the barrel once the brew is fermented and almost ready for drinking. We recommend a clear plastic tube between 2-3 metres in length.
1 x DIY Brewing Kit
This is not strictly orthodox if we’re talking true DIY every step of the way homebrews. However, we want to show you several different ways to create beer and these ‘ready to go’ kits are one of the easiest and quickest methods. They’re also the best way to end up with a taste you recognise; you can buy brew kits with flavour profiles set up to resemble your favourite commercially brewed beverages.
Sterilising Powder
Sterilising powder is easy to find online if you can’t source it at a supermarket or health food store. Look for powders which are sold specifically as sterilising agents for homebrewing. You can also use crushed up campden tablets as an alternative if you find and prefer them.
Measuring Cups
Again, very self-explanatory; homebrewing is all about precision so make sure you have measuring containers to get the ingredients amounts just right.
5-10 Sachets of Yeast
If you don’t get yeast sachets in a DIY brewing kit, you can pick them up from most supermarkets. Look in the baking section.
1 x Beer Capping Tool
Don’t forget, you’ll need a beer capper to put the lids on your beers once they’re finished and ready for storage. You can pick up these tools for a low cost online. They’re pretty simple and work like a reverse bottle opener, putting a sealed lid on rather than removing it. The capper needs to be reliable because, if beer isn’t stored in an airtight container, it quickly spoils.
Why Is Sanitation So Important for Homebrewed Beer?
If you know even a little about homebrewing, you’ll know sanitation is often talked about as a kind of bogeyman, the homebrewing trickster that’ll leave you with a week of hard work and no product to show for it. So, we want to put some common myths to bed.
Firstly, there’s nothing dangerous about drinking spoiled beer. Spoiled beer can happen for a number of reasons but, most often, it’s a result of improper sanitation and the accidental introduction of unwanted bacteria. It’s not dangerous, it won’t kill you, but it might taste very bad. For a beer that’s drinkable, flavour wise, the sanitation needs to be right.
Before starting the brewing process, you’ll need to sterilise all your equipment using the sterilisation powder you bought earlier. Scrub the equipment with soap and a clean cloth to begin with, then sterilise and sanitise it using the powder. Put a few teaspoons of the powder into your fermentation bucket and add warm water.
Leave this to soak for a minimum of two hours minimum. Lastly, add all of the equipment to the water in the bucket and leave it for another two hours. Remove and rinse everything thoroughly when you’re ready to start brewing. Throughout the process, keep cleanliness in mind and regularly re-sanitise equipment, surfaces, containers and your own hands.
Three Ways to Brew Your Own Beer At Home
Homebrewing may not be as complicated as people assume but it is a time consuming process. You’ll need several hours on the first day just for mashing, boiling, combining and cooling your ingredients. After that, be aware that even the easiest DIY homebrew kits need to be placed in a warm area for at least four days to ferment.
Be patient. Let all these wonderful ingredients do their job and come together to create something delicious.
One more thing: make sure to check the instructions for your yeast sachets. Some yeasts need to be warmed to room temperature overnight. Always check to make sure; you don’t want to arrive at brewing day and realise you’re not ready.
The Easy Way – Making Beer from a Homebrewing Kit
The homebrewing kits with the commercial flavour profiles we discussed earlier are widely available and easy to use. Standard kits include a large portion of malt extract infused with hops and a smaller amount of yeast (you may still need to add your own). The more expensive kits tend to include a little more malt extract. You could go this route if you prefer a thinner beer. The more refined sugar in the malt, the thinner the beverage.
If you’re thinking, couldn’t I buy a cheaper kit and add my own malt extract, you’re right. You could do this. However, the price difference between the cheaper and more expensive brew kits is usually quite small. Paying for extra malt extract would probably bring your total to the same cost as a pricier brewing kit anyway. It’s something to keep in mind.
Homebrewing Kit Method:
- Boil 3.6 litres (6 ¼ pints) of water. It’s a good idea to boil a little more than your recipe suggests. Don’t forget, the boiling process will reduce the volume of water in the pan.
- If you haven’t already done it, sanitise your fermentation bucket/container and stirring spoon. Malt extract can be awkward to decant. However, if you place it in warm water (while still in its container) for a few minutes first, it becomes less viscous and easier to handle. We recommend you do this before adding it to the fermentation bucket.
- Add the malt extract to the fermentation container. Then, add the boiling water and stir vigorously. The malt extract needs to be completely dissolve. If your DIY brewing kit requires you to add your own sugar (check the packet’s instructions to be sure), this is when you should put it in.
- Add as much cold water as the packet’s instructions advise. If you want a stronger alcoholic beer, you can add slightly less water and vice versa.
- Some brewing kits come with powdered hops. If yours has a powder, add it to the fermentation container only after the liquid has reached room temperature. This doesn’t need to be totally precise; just make sure it isn’t too hot or too cold, just comfortably lukewarm.
- The container must now be allowed to ferment in a warm location for 4-7 days.
- You’ll know it’s ready when there are no more bubbles being produced. Hydrometers are really handy for this stage of the brewing process. These little gadgets cost very little, they’re widely available and they can tell you what alcohol content a brew has reached.
- Now, it’s time to put your homebrew in the bottle.
The Medium Difficulty Way – Making Beer Using Malt Extract
To try something a little harder, you can get rid of the homebrewing kit and use a method featuring malt extract instead. Extract brewing comes with the advantage of more freedom over flavour profiles. You can experiment with different hops and malts, put exciting new combinations together and create something a bit more unique.
To make a homebrew using this method, you’ll need a high quality malt extract, hops and yeast (everything you’d usually get in a DIY kit). We’ve provided an ingredient list (below) to help you create the perfect first brew:
- 13 litres (23 pints) of water
- 1kg (2lb 2oz) malt extract
- 55g (2oz) dried hops
- 750g (1 ½ lb) sugar or pale dried malt extract
- Ale Yeast
Method:
- Boil half (6.5 litres) of the water. Add the malt extract to the pan. Then, boil for a further 25-30 mins. Add the hops and boil again for another half an hour.
- Use a colander to strain the brew mixture into your fermentation bucket or container. Don’t forget to stir constantly to dissolve the malt extract and keep the sugar moving.
- Add the remaining water and set aside to cool. When the liquid has arrived at room temperature, slowly add the yeast.
- Now, it’s time to seal the container with an airtight lid. It needs to be stored (and left unmoved) in a warm space until fermentation is complete. Again, if you have a hydrometer, it’s easier to know when this has happened. When hydrometer readings start to become consistent and regular, the fermentation process is ending.
- Take your empty bottles (the ones you’re reusing for your own brew) and carefully add a teaspoon of sugar to each. Now, siphon the beer into the bottles using your clear plastic tube. Take care to avoid the sediment; you don’t want this getting in your bottles.
- Leave the bottles untouched for a minimum of ten days. After this, they should be ready for drinking. Enjoy.
The Hard Way – Using All Grain Brewing to Make a Homebrew
This next method would be considered the hard or ‘expert’ way to brew a home beer. It’s a little more precise – you’ve really got to get your timings and amounts right – but it isn’t the endlessly complex task people like to think.
Imagine brewing is just like baking. There are many different steps involved but, individually, none of the steps are too complicated. It’s just crucial you perform each one carefully (and with exactly the right timings and measurements) because, success relies on each stage of the ‘bake’ being high quality.
The term ‘all grain’ brewing refers to the process of fermenting all the sugar and having the alcohol come entirely from the sugar. There’s no shortcut here. You won’t be using any malt extract to speed up the process. You’ll also need to undertake a period of careful, precise ‘mashing;’ otherwise known as boiling the grains. Mashing requires the grains to be held at a specific temperature until starches turn into sugar.
Ingredients:
- 20 litres (35 pints) of water (hard if you can get it)
- 65g (2oz) hops
- 2.25kg (5lb) pale malt
- 225g (½ lb) crushed crystal malt
- Ale Yeast
Method:
- Heat half of the water to 75°C. Now, carefully pour the liquid into a properly sanitised and airtight container (it can’t be your fermentation bucket because you’ll need this later). In our experience, a standard picnic cool box with a robust airtight seal is a good choice.
- Add the pale malt grains to a small square of lightweight, highly porous cloth (muslin is normally the cloth of choice for homebrewers). Tie the corners together to create a little bag so the grains can be in the water, interacting with it, but you don’t have to go in and scoop them out later. It’s just neater…and more efficient.
- Add the bag of malt grains to the boiled water in the sterilised container. Replace the lid. Set aside for sixty minutes.
- After sixty minutes, strain the water (now ‘infused’) into a large pan. Set aside.
- Heat another 5 litres (8 ¾ pints) of water to 75°C. Repeat steps two to four.
- Add your hops to a square of muslin just as you did with the malt grains. Once secure, place the ‘bag’ into your infused water or ‘wort’. Make sure none of the hops are going to spill out because the mixture now needs to be boiled for an hour.
- Once boiled, strain the liquid into your fermentation container.
- At this stage, it’s really important for the wort (water) to cool down fast. You can help it along by putting the container outdoors, partially submerging it in ice water or placing it in a cold areas of your house. It needs to plunge from 75°C (or higher) to just 21°C. Once it has reached this temperature, and only then, add the yeast.
- Put an airtight lid on the fermentation container. Now, set aside and leave for a minimum of four days but up to fourteen days. Again, you can use a hydrometer to tell you when the fermentation process is ending. You’ll know because the readings will start to become much more consistent and far less variable over 2-3 days.
- It’s time to start bottling. We recommend placing half a teaspoon of sugar in each bottle before filling them with your homebrew. Similarly, if you’re siphoning into a barrel, add four tablespoons of sugar to the bottom first. Leave your brew still and undisturbed for another seven days (minimum) before you think about drinking it.
Some Points to Consider When Fermenting Home Beers
Even a small deviation from a brewing recipe can give a home beer a much different flavour profile to what was intended. This is part of the excitement of brewing for the first time. As you gain experience, you’ll find new ways to stay consistent and produce the flavours you love time after time. To begin with, just be aware the temperature at the start of fermentation can have an impact on flavour.
The faster the beer begins to ferment (which happens if it’s not cooled quickly beforehand), the higher the volumes of ester and diacetyl. These compounds are known to generate noticeably fruitier flavours (similar to pear and banana). If you don’t like the sound of this, transfer your brew liquid to a cold location immediately after boiling. You don’t want to cool it quickly and leave it cold; once chilled, return it to warmer temperatures for fermentation.

